Shrimp!

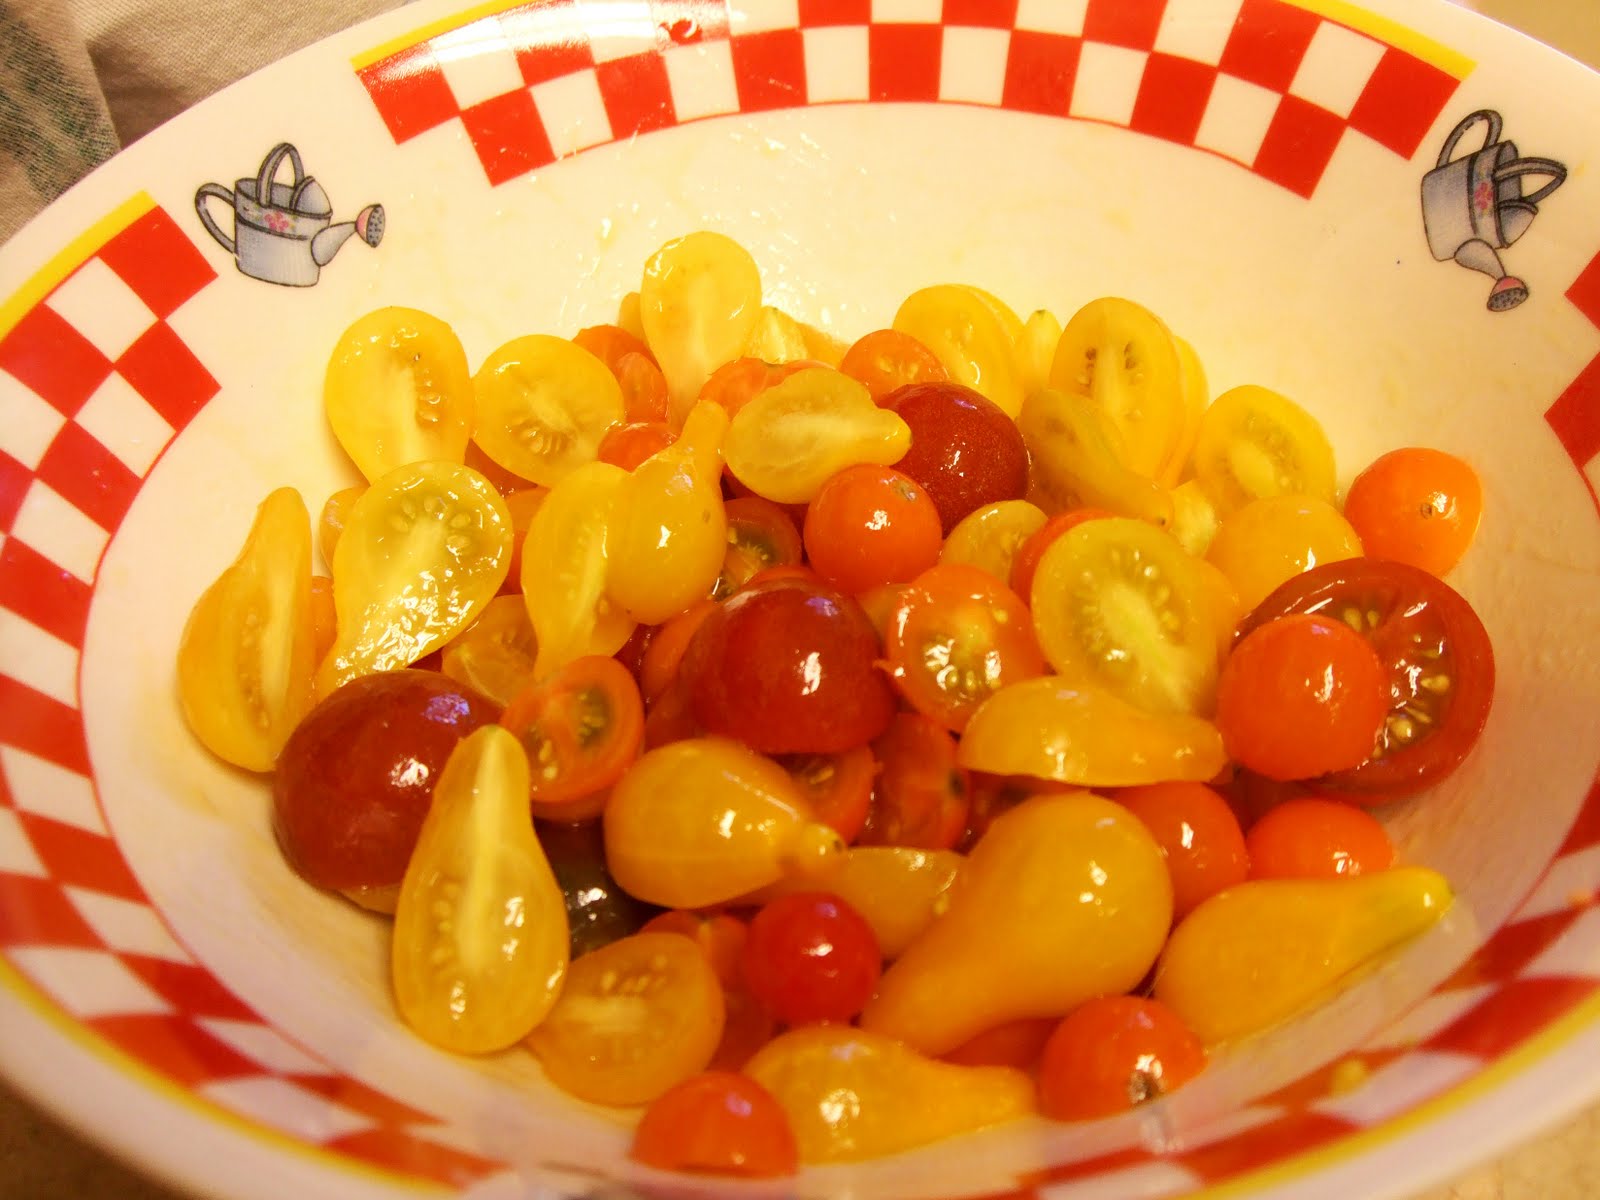
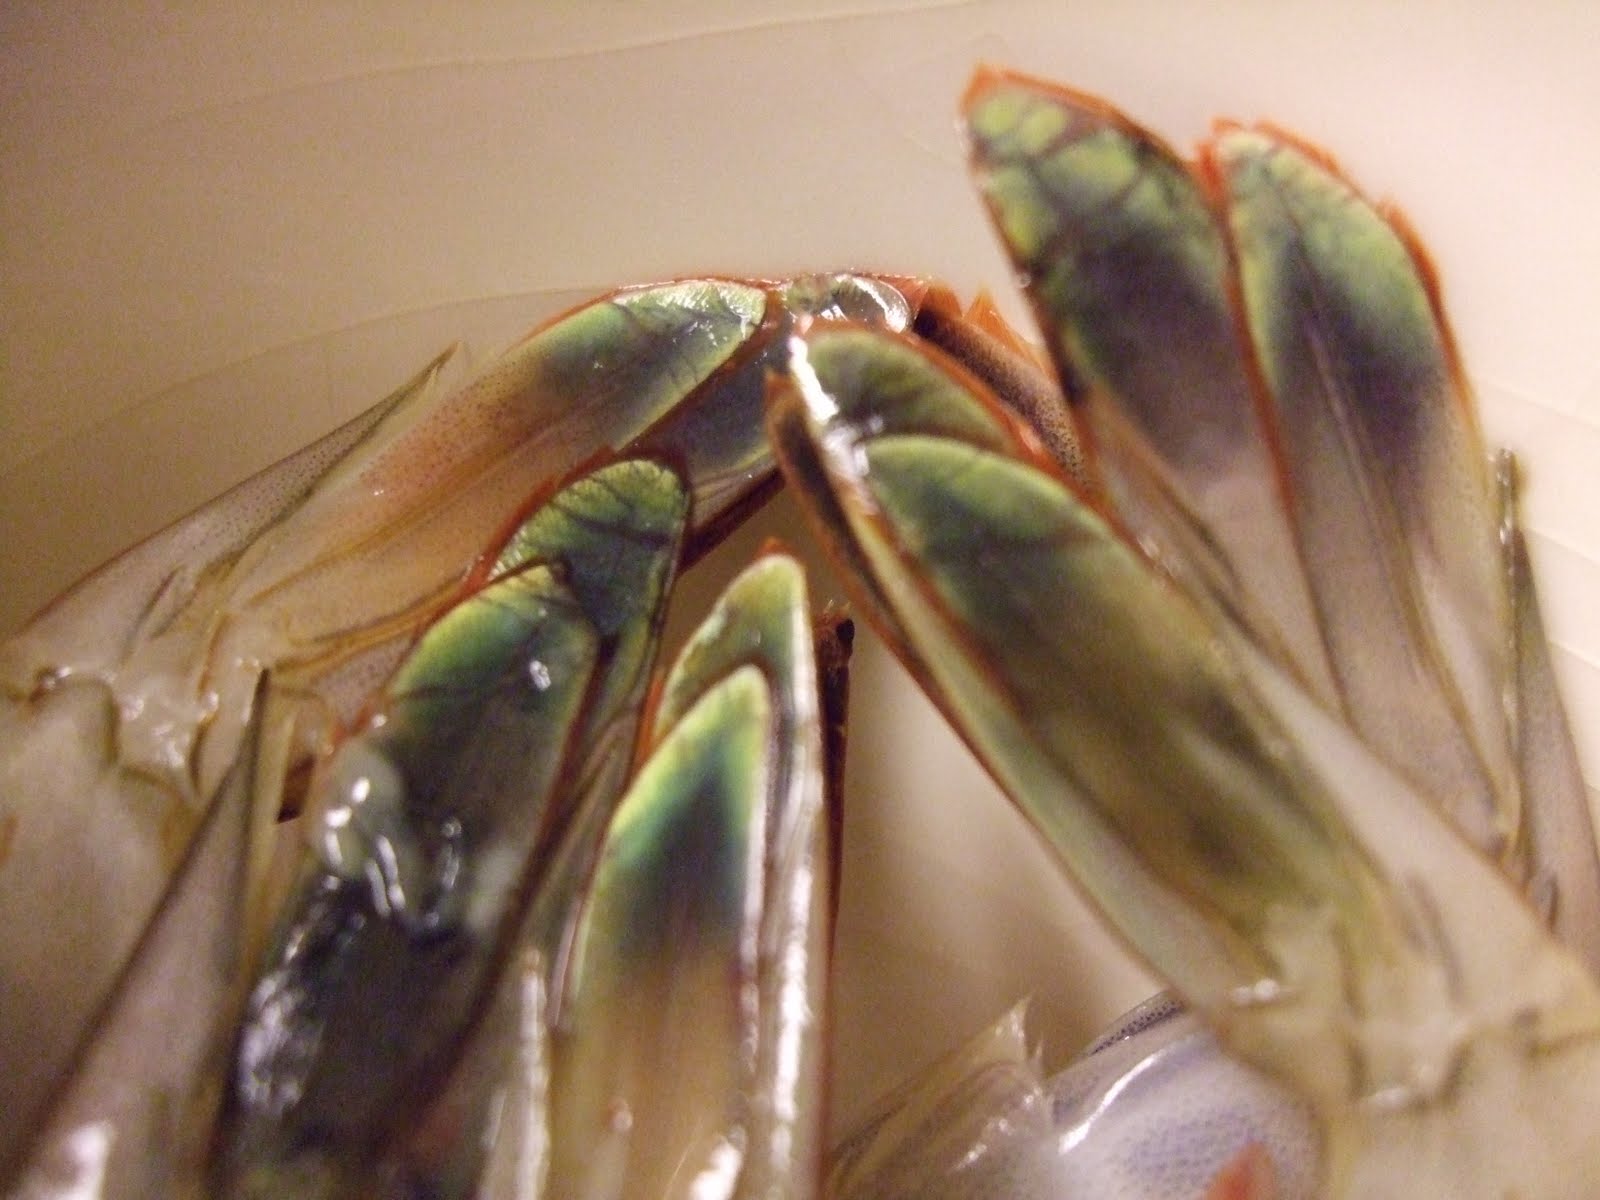
We have received some gorgeous shrimp from our CSF, which much to our dismay made its final delivery for the season on Thursday.

I especially love the green tints in the tails. Fairy wings must look like that.

The bounty of shrimp has led to a recent cooking extravaganza. In preparing them, I’ve referred to an old and dear favorite of Southern cooks, Charleston Receipts, for ideas. My copy, the 1973 edition, was snatched from the jowls of death while I was in college, grabbed from a pile of cookbooks a family friend was tossing out.

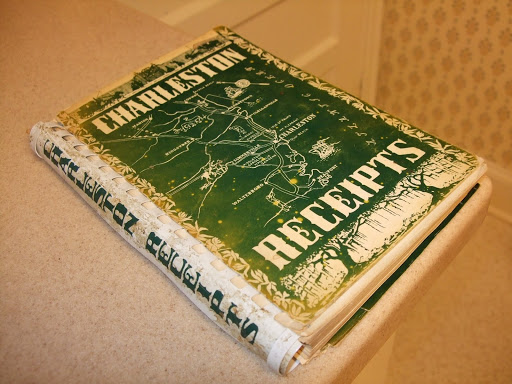
It’s easy to see why a suburban housewife would not want this filthy thing lurking on her tidy shelves. The cover isn’t even physically attached anymore. Still–how could someone throw away a book with 28 “receipts” featuring shrimp?

I’m quite fortunate to have help whenever we cook shrimp. Louise waits patiently in this exact position throughout the process, ready to clean up any stray bits that might happen to fall on the floor.

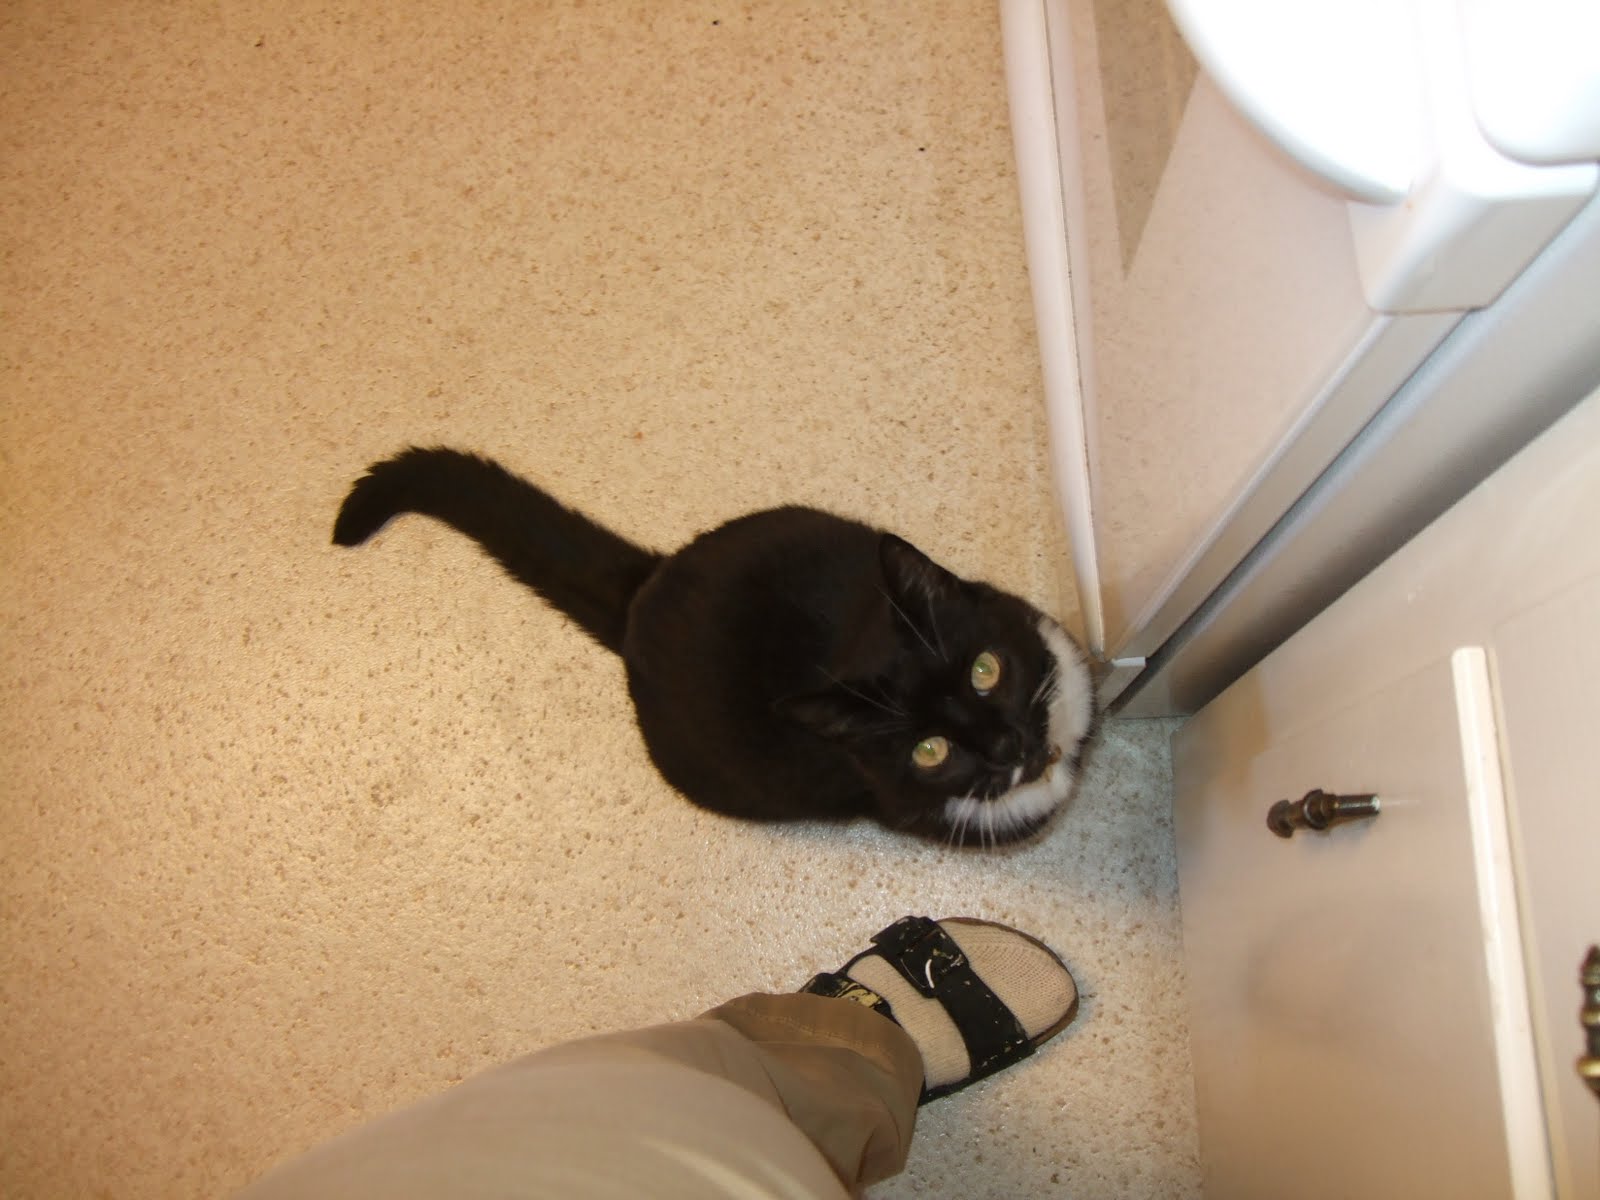
(Note: Those hideous Birkenstocks with socks are reserved solely for the home. I am more embarrassed than Tiger Woods at this unexpected revelation of my secret life.) 

Neither of these recipes comes from Charleston Receipts, exactly, but some of those dishes served as inspiration. You’ll note these two dishes are very similar–we had fresh jalapenos to use up!

Shrimp with Black Eyed Peas

This dish was actually better the next day.

Serves 4 as a main dish supper or 6 as a pre-dinner soup

2 tbsp. olive oil
1 large onion, chopped
1 medium jalapeno, minced
2 large cloves garlic, minced
1 lb. black-eyed peas
6 cups or more water
2 medium bay leaves
Kosher salt to taste
1 1/2 c. crushed tomatoes (canned)
1/4 c. flour
1/2 c. half and half or milk
24 medium shrimp with tails

Heat olive oil in large pot over medium high heat. Saute onion and jalapeno in oil until onion is translucent. Add garlic and stir. Add peas with enough water to cover them by an inch or two. Cover and bring to a boil over high heat. Reduce heat to low (but high enough to keep liquid at a simmer). Add bay leaves, salt, and tomatoes. Cook, covered, for about 45 minutes or until peas are tender, stirring occasionally. Add water as needed to keep peas covered. (Bring to a boil again if you add water, then reduce heat back to low.) Once peas are tender, whisk together flour and cream until flour has completely dissolved and no lumps remain. Add to peas and mix thoroughly. Add shrimp. Cover and cook for a few minutes until shrimp has turned pink, stirring frequently to keep sauce from sticking. Serve with rice or cornbread.

Shrimp with Black Beans and Rice

Serves 2

2 tbsp. olive oil
1 c. chopped onion
1 jalapeno, minced
3 -4 cloves garlic, minced
2 tsp. cumin
1 tsp. coriander
1 1/2 c. water (approximate)
1/2 c. dry brown rice
Salt to taste
1 bay leaf
1 1/2 c. crushed tomatoes
1 can black beans
Half and half or cream

Heat olive oil in large pot over medium high heat. Saute onion and jalapeno in oil until onion is translucent. Add garlic and stir. Add cumin and coriander and stir. Add water, rice, salt, bay leaf, and tomatoes. Bring to a boil over high heat. Lower heat to a simmer; cover and cook until rice is tender, about 40 minutes. Add beans and cream and cook until beans are heated, a few minutes. Add shrimp. Cover and cook until shrimp is pink, 4 – 5 minutes. Serve with cornbread.

Clammy Disaster

Fred and I received some beautiful clams from our CSF yesterday. We’d made a wonderful recipe with them just a few weeks before, simmering them in white wine, shallots, garlic, and a bay leaf, adding fresh parsley and butter at the end. Here’s how that dish turned out.

But yesterday we were out of white wine, and I’d just gotten the last of some pre-frost jalapenos from a colleague’s garden. So I decided to improvise and make a spicy broth.
We had red wine, beer, and turkey broth to serve as possible broths. I chose the beer, an India pale ale, thinking it would be the best complement to the jalapenos. I added shallots, garlic, a bay leaf, and some diced potatoes, bringing the ingredients to a boil and cooking until the potatoes were tender. All was going well. Everything smelled fine, a nice robust simmer of shallots, garlic, and jalapeno. I tasted a potato piece or two–they were tender and tasty enough.
Then I added the clams. Without washing them.
Fresh clams are not a regular part of my repertoire. I’ve opened plenty of cans and made a quick linguini dish with them, but I’ve rarely been willing to spend the money for fresh. I’m also a bit squeamish about cooking things that are still alive. So perhaps I can be forgiven for forgetting that clam shells are covered in an invisible grit. Invisible, that is, until it has sloughed off into your broth.
After the clams had steamed for about six minutes and were all opened, I ladeled them into bowls, poured the broth over them, and proudly presented them at the table. We dug in.
Fred took the first bite. This is sometimes followed by an exclamation of, “Honey, you are an excellent cook!” or “Wow!” He is very easy to please. There were no comments this time.
I scooped a clam from its shell. It was tender though not as flavorful as our earlier batch. I speared a potato. It was not obviously bad, but it lacked a certain richness. Then I tasted a spoonful of the broth.
Fred was eating silently, seemingly content. I wrinkled my nose.
“This is disgusting!” I exclaimed.
Fred put down his spoon. “I thought I noticed a metallic taste,” he said.
That comment proves without a doubt that Fred is a saint. The broth tasted like liquid tin foil, with sand added for texture. The jalapenos contributed a spicy note.
“We can’t eat this,” I said. “It’s awful.” 
Fred looked relieved. I suspect he would have eaten the entire bowl without complaint. I picked the bowl up and carried it away. He dove in to his salad. 
Not wanting to throw out an entire batch of fresh clams I drained off the broth, noticing that it was the color and consistency of a dirty pond. I rinsed the clams and potatoes multiple times. I took out the turkey broth–prepared over Thanksgiving–from the freezer and made a quick soup with onions, garlic, butter, more potato, herbes de Provence, thyme, bay leaf, pepper, and cream. I added the clam/potato remains back in and served it back to Fred, who had temporarily retreated into the study to look at Facebook–perhaps hoping to forget the horror of what he’d eaten earlier.
The soup was edible if not spectacular. We were able to determine that the metallic flavor actually came from the beer–I’m not sure why, since I’ve made beer-based dishes before without that effect. Fred thought it was the particular characteristic of an India pale ale, but we may never know for sure.
And the potatoes still tasted like tin.

Chicken Soup with Herbes de Provence

If you think this is not a thrilling post–“Chicken soup??”–you have never tried herbes de Provence. The French may be a pretentious, snooty, and cold people, but if they do nothing else besides create herbes de Provence and demonstrate to the world that six-week vacations ought to be mandatory, they deserve our love and respect.

Herbes de Provence are a magical mix of, obviously, herbs, chief among them thyme and lavender flowers. The proportions and spices will vary and can include savory, basil, fennel, sage, rosemary, and marjoram. My source, Whole Foods, offers a great combination in their bulk spice section–one of the few places you can actually get a bargain there.

Herbes de Provence are ideal for vegetables, fish, and chicken dishes. This soup allows their flavor to stand out, and the aroma alone makes it worth making on a cold day.

Chicken Soup with Herbes de Provence

2 boneless, skinless chicken breasts, cut into 1 – 2″ pieces (small enough for spooning)
1 medium onion, finely chopped
1 medium clove garlic, minced or grated (do not add more or it will overpower the herbs)
4 smallish/mediumish red potatoes, cut into 1″ pieces (3 – 4 cups)
2 cups peeled and sliced carrots
Chicken stock/broth to cover
1 – 2 tbsp. butter
2 tbsp. herbes de Provence
Salt and pepper to taste

In large soup pot, melt butter. Add onion and saute on medium-high heat until translucent. Peel and slice carrots and add to onions; saute about 5 – 10 minutes. While carrots are sauteeing, cut up potatoes, then chicken. Add garlic and stir. Add chicken to pot and cook for a few minutes, stirring occasionally, until chicken begins to be cooked through. Add potatoes, herbes de Provence, and salt and pepper; stir to coat ingredients with spices. Add stock to cover. Cover pot and bring to boil. Reduce heat to low and simmer until potatoes are tender, 20 minutes or so. Add cream to serving bowls if desired.

Flounder with Green Tomatoes and a Radish Salad

Seasonal cooking is ideal for the easily bored: if you don’t eat some things all the time, you get the chance to appreciate them anew every year.

Right now, we’re appreciating green tomatoes, as well as radishes, turnips, and their accompanying greens.

At $2.00 – $2.50 a bunch, these radishes from the Durham Farmers Market are costly little beauties. So I suggest you use every last bit and add the greens to a salad. I posted a simpler recipe for radish salad back in the spring, but the dressing here has a little more heft and can stand up to fall’s richer foods.

Radish Salad (Makes 2 large salads)

4 cups cleaned and dried radish and/or turnip greens, torn into bite-size pieces
6 radishes or small white turnips, thinly sliced

Dressing

1 tsp. olive oil
3 tsp. white wine vinegar
1 tsp. brown mustard
1/2 tsp. honey
Salt and pepper to taste
1 small clove garlic, crushed or grated with zester

Whisk dressing ingredients together. Toss with greens to coat; add more salt and pepper if desired and toss again. Top with radishes and serve.

As for the green tomatoes: Every decent Southerner knows that you’re supposed to slice them and fry them up in bacon fat. But my fried green tomatoes are often abject failures– slimy green discs with bits of charred breading sliding across them. So I’ve turned to other methods.

Green tomatoes, it turns out, are wonderful accompaniments to fish. Their tart, citrusy flavor is perfect with any mild white fish that you’d pair with lemon–like this beautiful flounder from our CSA.
 

Baked Flounder with Green Tomatoes
1 whole flounder, 1 – 2 lbs, headed and gutted, skin and tail on
4 cups chopped green tomatoes
1 medium yellow onion, chopped
2 extra large cloves garlic (ours came from the Durham Farmers’ Market)
1/4 c lemon juice
1 tsp. red pepper flakes, or more to taste

1/4 cup olive oil

Kosher salt and fresh ground pepper to taste

(Special Note: If you are The Cat, pretend that you do not want to wrestle the flounder to the floor and gnaw its bones. )

Preheat oven to 350. Lay flounder in broiler pan. Brush with enough olive oil to coat fish. Salt and pepper both sides. Stir together remaining ingredients together in large bowl. Pour over fish.

Cover with foil and bake for 20 – 30 minutes. To serve, scrape top layer of fish from bone, set on plate, and cover with tomatoes. Peel off bone and serve remaining fish. Be sure to let a piece or two fall to the floor so The Cat can take it with dignity.

CSF Saves Griller

The CSF previewed on this blog over the summer has arrived, and it is delivering great happiness to our home. Called Walking Fish and started by a group of Duke students at the Nicholas School, it is now delivering fish caught by North Carolina fishermen to members once a week. (Shares are sold out; watch the site for opportunities for next year.)

CSF stands for “community sponsored fishery.” It works much like a CSA (community sponsored agriculture), in which you purchase a “share” in advance and receive weekly deliveries. (We pick ours up at the Sarah P. Duke Gardens.) The advantage for the fishery is that they are guaranteed a certain level of income. The advantage for us is fresh fish at a decent price. For $11.67 per week, Fred and I receive between 1 and 2 pounds of fish, or roughly $7.78 per pound.

Fred forgot to pick up the first week’s delivery, but I have begun to forgive him. After that disaster, however, we have so far received shrimp, yellow-bellied spot, and mullet

which we prepared like this

The side dishes are mashed potatoes with roasted squash, zuchhini, onion, and tomatoes. But those are unimportant. The important thing here is that the fish is GRILLED–deliciously, beautifully, wonderfully grilled.

My days of embarassingly inept grilling may be drawing to a close. Thanks to a Saturday spent watching my friend Bebe, an expert griller, prepare salmon, I quickly discovered a painfully obvious reason for my failures.

I was excited when Bebe invited me over for fish one Saturday, and even more excited when I realized I’d have a chance to watch someone who knew what she was doing work the grill. I had planned to watch her technique closely: how she laid out the fire, whether or not she covered it, how much she opened the vents once lid was put on.

I stood in her backyard, wine glass in hand, ready to take notes as she gathered her charcoal and implements.

“I’m really glad I have the chance to watch you do this,” I said. “I just can’t figure out why I can’t get my food to cook right on the grill.”

“Well, there’s nothing to it,” she said. (All grillers say that, but if there were nothing to it, poor Fred would not have suffered through multiple servings of simultaneously charred and raw steaks.)

“Maybe for you,” I said, and blathered on as I watched: “I wonder if I’m putting the lid on too soon? Oh–I see you’re opening those vents underneath. I do that too, but it doesn’t seem to matter. And you’re using self-lighting charcoal–well, we can’t do that with our grill because it has the option of using a propane tank to light the charcoal and if we ever want to do that we can’t use the self-lighting grill or we’ll blow ourselves and the entire neighborhood sky-high.”

Then she put a pile of charcoal on the grill. A big pile.

“You use THAT MUCH charcoal?”

“Yeah, you need to make a pretty big fire. And it needs to get hot–wait until the flames die down and all the embers are red.”

Oh.

So for the mullet, I got me a big pile of charcoal–roughly three times what I’d been using before. I completely filled that damn starter and fired ‘er up. And the mullet was great.

Goat Kidneys

I seem to be the only person in Durham–or perhaps the nation–who is excited about the goat kidneys I found at the Durham Farmers’ Market a couple of weeks ago through Meadow Lane Beef farm. The near-universal response to the news that we’d tried them was a wrinking of the face, followed by an “Euw!” or an “Ugh!” or the occasional polite “Oh.”

The horror, though, was inevitably followed by curiosity: “So . . . what did they taste like?”
Fred described the flavor as “what you wished a giblet tasted like.” I said they were a cross between liver and a chicken thigh. The texture closely resembled that of liver, just firmer and with no tendency to crumble.

Unable to find a recipe for goat kidney even on my overburdened cookbook shelves, I turned to James Beard’s recipes for lamb kidney in his American Cookery.

Beard sure does love his offal. True, he devotes only a small section of the book’s 850 or so pages to the subject–but then again, he doesn’t even offer a recipe for cheesecake. Describing cakes, cookies, and other typical confections, he shows about as much enthusiasm as someone about to clean a bathtub: “This is a popular cake for church picnics.” “This cookie has an unusual flavor that is not unpleasant.” But when it comes to lamb’s tongues, he speaks as he would of a long-lost love or a beloved, recently departed parent:

There was never a time, it seems to me, when there were not some pickled lamb’s tongues on the shelf of our family larder. They were used for a quick snack, for a cold supper, for sandwiches, or for picnics. And how tender and delicious they were . . . . I fear that lamb’s tongues are lost to most people today, who won’t take the trouble to prepare them and don’t know what eating pleasure they are missing.

His descriptions of lamb’s kidneys were equally rhapsodic, so Fred and I eagerly anticipated trying the goat.

The kidneys were very easy to prepare. First, I removed the little tube in the kidney and the white gristle-y parts. Then I soaked them in milk for about an hour.

I brushed them with olive oil, seasoned with salt and pepper, and broiled about 5 minutes, turning once. The most important thing, it seems, is not to overcook them.

They were not as rare as James Beard suggested, but that was fine with us on our first try.

The verdict? We’ll try them again. And if anyone knows where we can get lamb’s tongues, please let me know.

Finally–Durham Farmers’ Market

It’s embarrassing to start two blog posts in a row with the phrase, “It’s a little embarassing . . .” So be it.

It’s a little embarrassing to have lived in Durham for over two years and never to have visited the Farmers’ Market. My early complaints about store produce were always met with tching from friends, who would scold, “You just need to go to the Farmers’ Market!” But their admonitions were also laden with various qualifications, “It’s small.” “You need to go early.” “It’s only on Saturday.”

Such comments had led me to expect a dozen or so ragtag booths, populated by earnest, tie-dye clad organic farmers, each with three or four tomatoes and some salad greens on display, all of which would have disappeared by 9:00 a.m. Why would I drag myself out of bed on the only day of the week I can truly sleep in for that?

Yesterday morning, though, I found myself in unusual circumstances. First, I was Fredless, since he was working a 24-hour shift at the hospital where he serves as a chaplain. Second, I was awake and about by 9:00. It was a gorgeous morning and I had nothing to lose, so I figured I’d stop by the Farmers’ Market and see what it had to offer.

Quite a bit, it turns out. First, there were these tiny heirloom tomatoes from Bluebird Meadow Farms. The orange ones could well be the sweetest, most perfect little tomatoes I have ever eaten.

I ate about half of them plain, then put the rest in this salad of olive oil with a dusting of sea salt. It turns out that plain was best–they were simply so perfect that the extra flavoring was wasted.


There were also these baby eggplant, though I can’t remember where they came from. They are coated in kosher salt, waiting to be broiled with olive oil and pepper as I type this.


Best of all, however, was this:

These are goat’s kidneys, from Meadow Lane Beef farm. Neither Fred nor I have ever tried kidneys, but they are soaking in milk and will be cooked for supper tonight. They are supposed to be quite tender and delicious. I will post results.
Durham Farmers’ Market, I am sorry I ever doubted you. I will be back!

Grilling Myself

It’s a little embarrassing to have been cooking as long as I have and to have such a poor command of the grill. Frankly, I’ve always been bewildered by cooks who say they love the grill because it’s so easy and cleanup is a snap. These must be people who also enjoy pounding their laundry clean over rocks in a river, or mucking out the barns of their cattle, or perhaps mowing the lawn with a pair of hand shears.

My experiences with our new grill over the last few weeks have typically gone something like this:

1) Crumple newspaper and stuff into bottom of chimney starter.

2) Set starter on bottom rack of grill and add charcoal. Forget that black dust has adhered to fingers. Wipe fingers on white shorts.

3) Light newspaper. Wait in hopeful but futile anticipation for flames to erupt. Cough and wave hands in front of face when seemingly non-existent wind somehow manages to blow smoke into eyes. Light another corner of newspaper. Get more smoke in eyes. Note flames beginning to erupt.

4) Run back up stairs into kitchen. Salt and pepper meat or fish as the grill heats up. Glance out door to check on fire. Note that there is plenty of smoke but no sign of fire.

5) Continue with meal preparation. Check fire again. When there is still no sign of fire, run downstairs to stare at smoking starter in hopes that flames shooting from eyes will cause charcoal to burn at last.

6) Repeat steps 4 & 5 several times until flames actually erupt.

7) Wait what seems a reasonable amount of time for charcoal to catch fire. Turn starter over onto grill and try not to catch self on fire as flames unexpectedly shoot from all corners of the starter.

8) Watch as fire either slowly dies or continues to rage uncontrollably. Futilely move various levers and knobs on grill. Run upstairs to collect various items you have forgotten (tongs, mitt, shot of bourbon). Eventually, toss food onto roaring flames, where it will char on the outside and remain nearly raw on the inside, or set onto icy rack over barely flickering embers, where it will lie inertly until you give up, take it inside, and cook it on the stove.

Still, we remain hopeful. Even the very poorly prepared swordfish and salmon I’ve produced has beated pan-seared and baked versions for taste and tenderness. If I ever get this grilling thing right, I’ll report results.

Grilling tips, anyone?