Chicken Liver Pizza

We love Rockwood Filling Station deeply and the idea of their chicken liver pizza even more. But I’ve never been entirely satisfied with their version, in which whole fried chicken livers are scattered over the top of the pizza in a grand clash of North Carolina-meets-Italy. The fried livers are too big to munch in a respectable bite of pizza, and there are too few of them to imbue the entire pie with their rich livery goodness.

Last weekend I solved the problem. I chopped up the livers and sauteed them in carmelized onions and spices before adding them to the top of the pizza. I won’t say that you’ll like this even if you don’t like chicken liver, because people who don’t like chicken liver never like chicken liver no matter how it’s served. But I will say that this tastes a lot like sausage, and that everyone needs to learn to like liver a lot more.

I have included a crust and sauce recipe if you need one.

Pizza with Spicy Chicken Liver and Carmelized Onions

Crust (from Cook’s Illustrated: The Best Recipe, p. 333)

I like to keep homemade pizza crust in the freezer, then put it into the refrigerator to thaw a day or two ahead. In this case, “a day or two” turned into a week, and the crust was gluey on one side and stiff on the other by the time I went to bake it. Still Fred declared it the best pizza crust he’s ever had, and even I have to admit it was quite good–thin and crispy, without a hint of sogginess.

1/2 c. warm water, at about 105 degrees
1 envelope (2 1/4 tsp.) active dry yeast
1 1/4 c. water, at room temperature
2 tbsp. extra-virgin olive oil
4 c. bread flour, plus extra for dusting hands and work surfaces
1 1/2 tsp. salt
Vegetable oil or spray for oiling bowl

Measure warm water into 2 c. measuring cup. Sprinkle in yeast; let stand until yeast dissolves and swells, about 5 minutes. Add room-temperature water and oil; stir to combine.

Pulse flour and salt in workbowl of large food processor fitted with steel blade to combine. Continue pulsing while pouring liquid ingredients (holding back a few tablespoons) through feed tube. If dough does not readily form into a ball, add remaining liquid and continue to pulse until ball forms. Process until dough is smooth and elastic, about 30 seconds longer.

Dough will be a bit tacky, so use rubber spatula to turn dough onto lightly floured work surface; knead by hand with a few strokes to form smooth, round ball. Put dough into deep oiled bowl and cover with plastic wrap. Let rise until doubled in size, about 2 hours. Punch dough down with your fist and turn out onto lightly floured work surface.

Roll out dough to about half desired size. Let rest while preparing other ingredients. Continue to roll out and let rest until dough is desired size. Roll edges in to form edging. Brush with olive oil just before adding toppings.

Sauce

1 28 oz. can crushed tomatoes
2 tbsp. olive oil
2 large garlic cloves, minced
Salt and pepper

Mix together in large bowl. Extra will keep for several days in refrigerator and can also be used as a base for pasta sauce.

Chicken Liver Pizza Topping

1 large onion, halved and thinly sliced
2 tbsp. olive oil
2 tsp. thyme
2 tsp. red pepper flakes
Coarse kosher salt to taste
3/4 to 1 lb. chicken livers, drained and chopped
1/2 cup grated sharp white cheddar cheese

Saute onions in olive oil over medium high heat until carmelized, about 10 minutes. Add remaining ingredients except cheese. Continue to cook, stirring frequently, until liquid has evaporated, about 10 – 15 minutes. Reduce heat about halfway through cooking time to prevent burning.

Place oven rack on bottom level and slide in pizza stone. Preheat oven to 550 or hottest temperature possible. Place rolled out dough onto pizza peel sprinkled with cornmeal. (I use a cookie sheet without edges.) Spread tomato sauce over crust, leaving about 1/4 inch around edges to prevent spillage. Spoon chicken liver mix evenly over crust. Remove pizza stone from oven and slide pizza onto stone. (Imagine you are trying to pull a tablecloth out from under a fully loaded table without moving anything and you might avoid disaster.) Return to bottom rack of oven and bake for 6 – 12 minutes, until edges of crust begin to brown. Add cheese to pizza and cook for 2 – 3 minutes longer, until cheese has just melted. Transfer to cutting board. Slice and serve.

A Beet, a Pickle, and a Potato Walk into a Bar . . .

My explorations of Sundays at Moosewood continue, and thank God I’m I nicer person than I was in the early 1990s. In reading through the section on food from the Southern United States, I came across the very sentence that nearly led me heave the book out the window: “I had to redefine Southern cooking in order to present it without meat.”

Therein lies the major shortcoming of the book. If the cuisine I grew up with has been rendered unrecognizable (the author suggests adding Gouda cheese instead of bacon to give Southern dishes their smokey flavor, an idea that’s only slightly better than shoving a fork into your own eyeball), then I can only imagine how they’ve desecrated the cuisines of Africa, India, and China.

But I’m a calmer person now, content to labor along in abject ignorance of other cultures and willing to accept butchered versions of “authentic” dishes if they are edible. Thus I came across the recipe below for Russian salad–which used a miraculous combination of beets, pickles, and potatoes to clear out the entire supply of oddball items left lurking in my refrigerator.

The recipe comes from the section in Sundays at Moosewood on Finnish cuisine. The recipes, focusing on root vegetables, are fascinating, but there’s still a lot of earnest vegetarianism to overcome. The author of this section is a grad-school dropout who adopted some goats from a Finnish farmer, couldn’t bear to kill them, and started rescuing animals at livestock auctions. I sympathize (heck, I still can’t bring myself to eat veal)–but then, there’s the problem with the fish and the need to take advantage of what’s available in local conditions. Never mind that “the Finns do eat a great deal of fish, as is quite natural in such a watery place”; the author writes: “I don’t eat fish myself or recommend it to others, so I’ve not included fish recipes in this chapter.”

I’ll let the reaction of her Finnish neighbors to the smorgasbord Moosewood put on for them sum all this up: “Knowing how nostalgic Finns can be about their traditional foods, it was with some trepidation that we presented our [vegetarian] versions of some age-old dishes. But all was well. Nothing was too far off the mark or else, with the usual quiet steadiness and reserve of the Finnish folk, they didn’t let on.”

If those Finns had been in North Carolina, they’d have been saying, “Bless their hearts” quietly to themselves.

To honor the fishy Finns, I served the Russian Salad with a mackerel recipe adopted from James Beard’s “Mackerel in Escabeche.” It was a great combination of spicy and sweet, hearty and light. In this case, I DO recommend fish to others.

Russian Salad (Venalainensalaatti) (from Sundays at Moosewood, p. 263)

2 c. cooked, diced potatoes (the recipe says to peel; I did not)
2 c. peeled, diced, and cooked carrots
1 c. peeled, diced tart apple
1 c. minced dill pickles (we used Claussen’s)
1/2 c. minced onion
2 c. cooked, peeled, and diced beets

Cooked beets for Russian Salad, from Britt Farms
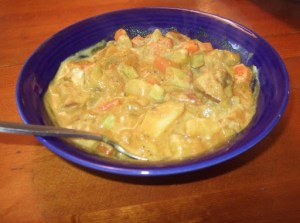
Dressing
1 c. sour cream (or 2/3 c. heavy cream)
2 tbsp. fresh lemon juice or cider vinegar (we used lemon juice)
Dash of salt, sugar, and freshly ground black pepper

Hard-boiled eggs, sliced

Dressing for Russian Salad

Mix potatoes, carrots, apple, pickles, and onion in large serving bowl. Chill. (I did not.) Combine all the dressing ingredients and chill. (Again, I did not.) Add the beets to the other vegetables just before serving. Fold dressing into salad just before serving. Can also serve dressing on the side or mounded on top of the salad. Decorate with egg slices.

Russian Salad ingredients assembled

Mackerel in Escabeche

3 mackerel steaks, salted and peppered (1 1/2 lb.)
1/4 c. lemon juice (recipe calls for lime)
1/4 c. orange juice
2 tbsp. olive oil
1 onion, finely chopped
2 stalks celery, chopped
2 tbsp. red pepper flakes
4 small cloves garlic, minced
2 tbsp. minced fresh cilantro
White wine

Mackerel awaiting saute

Saute all ingredients except mackerel, cilantro, and wine in large skillet until onions are translucent, about 5 minutes.

Vegetables in saute

Add cilantro and mackerel.

Mackerel sauteing, just before covering

Cover and cook for about 2 minutes. Turn fish, cover and continue to cook until mackerel is just done, about 5 more minutes. Check after 1 – 2 minutes, and if sauce begins to dry out, add a few splashes of white wine.

Voila! Finland meets Mexico

Return to Moosewood: Vegetable Curry

Efforts to claw my way out of the cooking rut are beginning to succeed, as my old friends, the Moosewood Collective, lent a very helpful hand earlier this week.

I became acquainted with Moosewood during my six-month vegetarian period, which lasted from the fall of 1987 to one day in the spring of 1988, when a Krystal oasis wafted its heady onion-burger scent across a concrete desert of strip malls and lured me back into the dark world of flesh eating, never to return.
Moosewood Restaurant, in Ithaca, NY, was an early vegetarian mecca. Their first two books, The Moosewood Cookbook and The Enchanted Broccoli Forest, introduced me to exotic new dishes such as Welsh rarebit and lentil soup. In 1990, they put out Sundays at Moosewood Restaurant, featuring menus focused on foods from a specific region (India, the Caribbean, the American South, New England, etc.)

But the timing was off for me. By the time I got Sundays at Moosewood as a present sometime in the early 1990s, I was living in Madison, WI, where I was quickly wearying of earnest, Birkenstock-clad, dredlock-sprouting vegans and vegetarians. I’d had enough of middle-class white grad students appropriating select tidbits of other cultures in the name of “diversity,” especially when they failed to realized that a hairstyle that looked wonderful on people with thick, curly hair was going to turn into a smelly, matted rat’s nest on them. I was over Moosewood. I didn’t need their sanitized versions of “ethnic” vegetarianism anymore.

So the book sat on my shelf virtually untouched until last week. But having grown up a bit, and becoming more patient with others (even white people with dredlocks) and myself–and being nearly desperate for some new vegetable recipes–I opened up Sundays at Moosewood again.

I was pleasantly surprised. Without meat, of course, many of the recipes aren’t going to resemble what you’d find in the region from which they came. (Vegetarian Brunswick stew? Please.)* Still, Sundays at Moosewood offers a good place to start sampling different cuisines and try out fresh flavors.

*I should note that Fred loves the vegetarian Brunswick stew at Whole Foods. He claims it’s wonderful if you add barbecued pork.

I turned to the section on India first. Each section of the book has a different author, and only two have names that suggest they grew up eating the foods they write about. Linda Dickinson, the author of the section on India, is one of them, and my reservations about the book came surging back when I read her introduction. Her first exposure to Indian food came in Cambridge, Massachusetts, when her roommate made an Indian dinner. I have a sneaking suspicion that she was an enthusiastic participant in the post-Beatles India fad of the 1960s and fear that she still favors flowing batik skirts with Tevas.

Still, Linda, bless her heart, has done a heck of a lot more than I ever will to understand Indian food. I did not actually use one of her recipes but cobbled together the one below from the techniques she suggested. Most important is to heat the spices in the butter first to bring out the flavors.

This dish is probably as “authentic” as vegetarian Brunswick stew–I didn’t even make my own spice mix. But until I decide to get my own Indian cookbook, the wildly complex food of India is probably beyond my ken. This will do for now. Thanks, Linda.

Vegetable Curry

2 tbsp. butter, melted
2 tbsp. muchi curry powder (available at Whole Foods)
1/2 c. minced onion
4 small to medium red potatoes, diced, cooked until just tender
3 carrots, minced
1 Mediterranean squash, diced (zucchini and chayote squash would work nicely as well)
3 small cloves garlic, minced
Salt and pepper to taste
Milk and sour cream (yogurt would be more appropriate for an Indian dish, but we didn’t have any)

Melt butter in large skillet over medium high heat. Add curry powder and heat until spice becomes aromatic, about 20 – 30 seconds. Add onions and saute for 1 – 2 minutes. Add garlic and stir. Add carrots and squash. Stir, cover, and saute about 5 minutes or until vegetables are tender. Stir in potatoes until well-coated. Salt and pepper to taste. Add milk and sour cream until dish is desired consistency. (I use roughly 1/4 c. milk and 3/4 c. sour cream.) Can serve over rice if desired.

Chickenless Chicken and Dumplings

Faced with a fresh pile of vegetables from our CSA once again, I was forced to turn down an invitation to the Durham Bulls game last night to stay home and cook them. (The unpleasant prospect of sitting outdoors on a cloudy, muggy, rain-splattered evening had nothing to do with it.) And so I felt compelled to Do Something.

My first thought was to make a vegetable pot pie, so I pulled out my handy Cook’s Illustrated: The Best Recipe for some guidelines. But the book magically opened instead onto the recipe for chicken and dumplings.

It’s been years since chicken and dumplings crossed my lips, and what a sad thing that is. They were a childhood favorite (back when the first line of my grandmother’s recipe would have read, “Kill chicken”), but I don’t find myself making them very often. The main reason is that I can no longer call my grandmother to get the recipe because I’ve forgotten it and could never remember to write it down.

Unfortunately my mother cannot be of help here because this is an area of deep division between us. Her mother (my other grandmother) was a proponent of flat dumplings, which are rolled out before they are added to the dish. My father’s mother was squarely on the side of drop dumplings, which are formed into balls and “dropped” in.

The flat/drop debate has raged in our family for decades now with no clear resolution. My mother, usually right about everything, has yet to see the merits of my argument in this particular case. To me, flat dumplings cannot even approach the fluffy perfection of a well-made drop dumpling. Properly done, drop dumplings are exceedingly light, with an inside like a tender, cakey biscuit, all surrounded by a very thin layer of rich, creamy dough. How can a flat, chewy lump even compare?

Still, the biggest obstacle to my making chicken and dumplings last night was that I had no chicken, and I wasn’t going to send even Fred out into a misty, damp evening to get one. Luckily, the Cook’s Illustrated recipe is called “Chicken and Dumplings with Aromatic Vegetables”–and I figured I had the second part of that covered. So I modified the recipe and came up with this dish.

Of course, the dumplings are not quite as light and fluffy as my grandmother’s. But lost recipes are like that–always made better by the fact we can’t have them anymore.

Note dumpling’s fluffy, tender goodness

Vegetable Stew with Dumplings

4 tbsp. butter
1 onion,chopped
3 medium carrots, peeled and diced
1 large zucchini, cut into 1/2″ pieces
1 medium yellow squash, cut into 1/2″ pieces
1 1/2 c. frozen peas
6 tbsp. flour
2 tsp. thyme
Salt and pepper to taste
4 c. chicken stock
Cream, if desired

Melt butter in soup pot or Dutch oven over medium high heat. Add onion and saute until translucent. Add carrots and saute for 5 – 10 minutes. Stir in zucchini and squash. Cover and cook for 5 – 10 minutes, until vegetables are just tender. Make dumplings and set aside. Stir in flour, thyme, salt, and pepper until flour vegetables are coated. Add chicken stock and bring to a simmer. Add peas. Add cream if desired. Lay dumplings over top of liquid. Cover and simmer for 15 minutes until dumplings are done.

Baking Powder Dumplings (from Cook’s Illustrated: The Best Recipe, p. 162)

2 c. flour
1 tbsp. baking powder
3/4 tsp. salt
3 tbsp. butter
1 c. milk

Mix flour, baking powder, and salt in medium bowl. Heat butter and milk to simmer and add to dry ingredients. Mix with a fork or knead by hand two to three times until mixture just comes together. Form dough into balls about 2″ in diameter.

The Cooking Well Runs Dry

With all the vegetables we’re receiving lately, you’d think that I’d be posting recipes almost every day. The trouble is that I have entered a rut familiar to all cooks who have been at this game for a while. “I just cook the same old things,” my grandmother used to say. So it is with me. Tired at the end of the work day, I turn to well-worn formulas, spices, and combinations to get supper on the table. Onions and garlic are sauteed in olive oil; another vegetable or meat is added; herbs are tossed in; everything gets dumped over pasta, rolled into a burrito, or served over potatoes.

And that’s okay, because a few experiments over the last week or so revealed why it’s probably best to trudge along in your little food rut until a clear path out is revealed. Efforts to claw your way over the edge will result in injury only to yourself and others who are forced to eat the unsavory products that emerge in the process.

The baked cabbage should serve as sufficient warning. We’ve been slightly overwhelmed with cabbage lately, after buying a couple of heads just before receiving more from Britt Farms, our CSA (Community Supported Agriculture). Of course, it really doesn’t take much cabbage to overwhelm even an experienced cook. Not only does it increase exponentially with each cup that is used, it also conjures only a limited number of dishes to mind. Having made cole slaw, added it to soups, steamed it, eaten it raw, and even considered then quickly dispensed with the idea of making homemade sauerkraut after realizing the impracticality of storing rotting vegetable matter in a pot in the basement for a month, I was pretty well out of ideas.

Then I remembered a recent New York Times Magazine article on baked kale, which I’d tried and which had made a pleasantly crunchy snack. You took kale leaves, rolled them up, sliced the rolls into thin strips, tossed in olive oil and salt, and baked them in the oven at about 400 degrees for several minutes until they crisped up. They made a light, crunchy snack.

Cabbage doesn’t do that. It makes a heavy, chewy, oily snack. You can try cooking it until the cabbage browns, but then you will have a bitter, crispy, burned-tasting, oily snack. If you have a sweet, kind husband as I do, he will taste the results and declare them “interesting.” If you are a sweet, kind wife in return, you will take the whole mess, toss it straight into the trash, and make a nice dish of olive oil, onions, garlic, your favorite spices, vegetables, and pasta.

Better Amish Friendship Bread

The moment we’ve been waiting for since February 24 has arrived. In an effort to create a version of Amish Friendship Bread that I actually like, I’ve turned our house into a bread factory over the last few months. I’m pleased to say that these attempts have not been in vain.

I started with the original recipe, below.

Original Amish Friendship Bread

I’m not sure this is the original starter, but it’s what I found on the Internet. There are many versions that use yeast, but I suspect this one did not.

1 cup flour
1 cup milk
1 cup sugar

Put ingredients in plastic bag and seal.

Day 1: Do nothing.
Days 2 – 5: Mash the bag
Day 6: Add 1 c. plain flour, 1 c. sugar, 1 c. milk, and mash the bag.
Days 7 – 9: Mash the bag.

Day 10:
Pour entire contents of bag into a non-metal bowl. Add 1 cup plain flour, 1 1/2 tsp. baking soda, 1/2 tsp. salt, 1 1/2 c. sugar, and 1 1/2 c. milk. Mix.

Measure out 4 bags of 1 c. each. Put batter into Ziplock gallon bags and keep a starter for yourself and give the others to 3 friends with a copy of the recipe.

Baking Instructions

Preheat oven to 375. To remaining batter in bowl add and stir:

3 eggs
1 c. oil (or 1/2 c. oil and 1/2 c. applesauce)
1/2 c. milk
1 c. sugar
2 t. cinnamon
1 1/2 t. baking powder
1/2 t. salt
1/2 t. baking soda
2 c. plain flour
1 lrg. Box instant vanilla or choc. Pudding (surely the Amish cook who added this was excommunicated)
1 c. raising or chopped nuts (opt.)

Grease 2 large loaf pans. In a bowl mix 1/2 c. sugar and 1 1/2 tsp. cinnamon. Dust the pans with 1/2 of this mixture. Pour batter evenly into 2 pans and sprinkle with cinnamon sugar mix over top. Bake for 1 hour.

And Now for Something Completely Different

It doesn’t take a mathematician to figure out that no one has enough friends to keep this up. Maybe you know dozens of people who want to keep rotting dough in plastic bags around the house and bake bread every 10 days, but I don’t. After just one month I felt like the owner of an unspayed cat, with kittens everywhere and no idea who would take them. And you are one blessed person, or an Olympic marathoner, if you can eat this stuff week after week and not become a bloated testament to the effects of a sugar-infested, overprocessed American diet.

I also wanted a recipe that didn’t completely cover up the flavor of the starter itself. Starters, after all, are the key ingredient for wonderful sourdough breads, and what better way to make one than with, um, soured dough? I’d hoped that the friendship bread would have the nice bite of one of these loaves, but it was, alas, buried in the onslaught of sugar, cinnamon, and the lrg. Box of inst. Pudding.

My experiments over the last couple of months have led to a series of recipes that alter the original so much that to call it a “variation” would be ridiculous. So I’m christening this “Newlywed Bread” because a) it rhymes; b) two people can eat a loaf in a week without gaining so much weight together that they have to spend every Monday night at Weight Watchers; and c) like newlywed couples, cooks who make this don’t have to share even one tiny bit of it with another living soul.

The starter is simple and very forgiving. The only trick is not to use any metal when working with the starter (though using metal in the baking process seems to work fine.)

Newlywed Bread Starter

1 cup flour
1 cup sugar
1 cup milk

I put this in a glass bowl covered with a towel (hand-embroidered, of course, to remind me that I’m a little old lady at heart). Yeast does not seem to be necessary, and I like to think it’s because this starter works like the ones for sourdough bread, which absorb yeast from the environment.

Instructions

Day 1: Do nothing.
Days 2 – 5: Stir with wooden or plastic utensil.
Day 6: Add 1 1/2 c. flour, 1/2 c. sugar, and 1 c. milk.
Days 7 – 9: Stir.
Day 10: Bake (recipes below).

After the first ten days, feed the starter every 5 – 10 days. It is a living thing and requires nutrition to keep going. It will rise up overnight into a bubbly mass if it is healthy. If it starts to rise less, lose its bubbly texture, or quits rising altogether, it needs to eat. Feed it:

1 1/2 c. flour
1/2 c. sugar
1 c. whole milk (I use 1% with a little half and half)

You can add half this amount (3/4 c. flour, 1/4 c. sugar, 1/2 c. milk) if your starter is getting too big.

Every ten days or so, you should bake a loaf. You can bake more often if you like; just feed the starter whenever you remove some for baking. If you can’t bake very often and your starter gets too big, you can freeze it, refrigerate it, discard some of it, or–heaven forbid–give some to a friend along with a copy of the recipe.

All of these breads have a hearty whole wheat texture. Most are still on the sweet side, but they’re closer to bran muffins than cakes. Most also include buttermilk, which add an extra bit of sourness–perfect for the sour among us, without enough friends to share.

Newlywed Bread Basic Recipe

Preheat oven to 350. Grease 1 loaf pan.

Remove 1 c. starter and place in large mixing bowl. Add to starter:

3 eggs
1/2 c. buttermilk
1 c. melted butter (add to buttermilk to cool before adding to mix)

Whisk together in separate bowl:

2 c. whole wheat flour
1/2 c. oats
2 t. baking powder
1/2 t. baking soda
1 t. salt
2 t. cinnamon
1/2 c. brown sugar

Add dry ingredients to batter mix and stir. Pour into loaf pans and bake one hour. Remove from pan and cool.

I’ve made several variations on this recipe, though the “variations” are often quite different. Below are some favorites.

Sweet Potato Newlywed Bread

Preheat oven to 350. Grease 1 loaf pan.

Mix together in large bowl:

1 c. starter
1/2 c. baked sweet potato, mashed
1/2 c. buttermilk
1/2 c. melted butter (add to buttermilk to cool)
3 eggs

Whisk together:

2 c. whole wheat flour
1/2 c. oats
2 tsp. baking powder
1/2 tsp. baking soda
1 tsp. salt
2 tsp. cinnamon
1/2 tsp. cloves
1/2 tsp. nutmeg
1/2 c. brown sugar

Pour in loaf pan and bake for 1 hour.

Variation: Maple Fig

Replace sweet potato with 1/4 cup pureed fig preserves and 1/2 c. maple syrup. Increase oats to 1 cup.

Irish Soda Newywed Bread

This one is more like a hearty sandwich bread, with only slightly sweet taste, and with the strong soda flavor characteristic of the orignal Irish version. It’s baked as a round rather than in a loaf pan to give it a beautiful crispy crust all over.

Fred prefers this loaf sweeter than I do, so simply increase the sugar to 3/4 cup if you want more of a breakfast bread.

Preheat oven to 400. Grease bottom of cookie sheet.

Mix together in large bowl:

1 c. starter
1 c. buttermilk
2 1/2 tbsp. melted butter (add to butter milk to cool before mixing)

Whisk together:

2 c. oats
1/2 c. whole wheat flour
1/2 – 3/4 c. brown sugar (depending on sweetness you prefer)
1 1/2 tsp. baking powder
1 1/2 tsp. salt

Add dry ingredients to batter and stir until mixture comes together. Turn out on floured surface and knead about 15 strokes. Form into round loaf shape and place on cookie sheet. Bake for 1 hour (check after 45 minutes for doneness.) Brush with melted butter.

New variations keep emerging. I’ll keep you posted.

New Love

Last week we received the first delivery from our new CSA (Community Sponsored Agriculture)–Britt Farms in Mt. Olive, NC. They don’t have a web site, but you can read about them here. We were attracted to this farm by the fact that it’s been family owned for several generations and is less concerned with the niceties of being organic than with getting us some good produce. (And we have no idea what happened to Snow Creek Organics, our CSA from last year.)

And good produce it is. Today we received spinach, radishes (gone), strawberries (nearly gone), two different types of lettuce, asparagus, and delight of delights, O’Henry white sweet potatoes. The radishes and strawberries were revelations. With the bland varieties we get in the store, I’d forgotten that radishes can have a bite and that strawberries can have amazing undertones of lemon and wine. What a great reminder of the glorious variety we can get in our vegetables.

The white sweet potatoes led me to make this interesting and delicious Mexican-inspired soup. I used tomatoes my mom grew and canned, which helps, but a high-quality store-bought version should yield good results.

White Sweet Potato Soup with Chipotle

Serves 2 as a main dish or 4 as a first course

1 onion, halved and sliced thin
1 tbsp. olive oil
3 -4 cloves garlic, minced
4 stalks celery, chopped
1 large white sweet potato, peeled and cut into 1/2″ cubes
1 1/2 – 2 cups good quality chicken stock
16 oz. high quality canned whole or crushed tomatoes, with juice
1 large dried chipotle pepper
1/2 tsp. coriander
Salt to taste
1/2 lb. elbow macaroni

Saute onion in olive oil over medium heat until translucent, adding a little chicken broth if it begins to brown. Add garlic, celery, and a few tablespoons broth. Saute over medium heat until celery is tender, about 10 minutes. Add remaining ingredients except macaroni and stir. Cover and bring to a boil. Reduce heat; cover and simmer about 15 – 20 minutes or until potatoes are tender. Add macaroni and stir. Increase heat to high and bring to boil again, stirring occasionally. Cover and reduce heat to medium low. Simmer until macaroni is cooked, about 10 minutes more. Correct seasonings and serve.

Radish Salad

I’m feeling better about Food, Inc. today. Sure, it trod much familiar territory, but walking through the Whole Foods Industrial Complex yesterday, I was struck with the happy thought that the film also featured one of my favorite rants: the high cost of sustainably grown and/or organic food. At one point, the filmmakers follow a working class family through the supermarket, where they have to consider how reasonable it is to buy two pears for 99 cents when they could get an entire hamburger for the same price.

I was faced with the same dilemma in Whole Foods yesterday as I stood in front of a gorgeous display of organic radishes, their round little magenta bottoms delicately nestled in a lush bed of crispy green leaves. Feeling guilty about some recent purchases of factory-farmed meat at ridiculously low prices, I had decided to punish myself by walking over to Whole Foods, loading up on expensive but sustainably farmed meat, and lugging all twenty pounds back home in a single large cloth bag. Maybe if I threw my shoulder out, I reasoned, God would forgive me.

My self-righteously reusable cloth bag bursting with swordfish, a whole chicken, a roast, two pounds of ground chuck, half and half, and a wallet soon to be considerably lighter, I contemplated the radishes, at $2.49 a bunch, wondered if my shoulders could take on an additional half pound of costly produce. I thought of the people who agonized over the pears and about how crazy it was that you could get a hot dog and soda at Costco for the same price as those radishes. What the heck, I thought.

I like to think that I made up for my indulgence just a bit by using every bit of those radishes in the salad I made for supper. Radish greens can be quite good, as long as they are fresh, bright green, and not too large. They also should be thoroughly cleaned, as they tend to collect dirt. This salad is very easy and brings out the best of the greens and the radishes themselves.

Radish Salad

Serves 2

1 bunch radishes
Olive oil (extra virgin)
White balsamic vinegar
Salt

Cut radishes from leaves and set aside. Thoroughly clean greens and trim stems. Dry in salad spinner or on towels. Wash radishes and trim ends; dry. Tear greens into bite-sized pieces, if necessary, and place in large salad bowl. Thinly slice radishes and add to greens. Drizzle olive oil (1 – 2 tbsp.) over top, lightly splash with vinegar (1 – 2 tsp.), and salt to taste. Toss until greens are coated and serve immediately.

Food, Inc.

Last night we went to see Robert Kenner’s documentary Food, Inc. at the Full Frame Documentary Film Festival here in Durham. I should have loved it. The auditorium at the Carolina Theatre was filled to the brim with liberal locavore-loving foodies just like me, secure in the knowledge that our organic herb gardens were sprouting and our CSA deliveries were scheduled for just a couple of weeks away.

But if you’ve been aware of these issues since the 1980s, when you first read Frances Moore Lappe’s Diet for a Small Planet (first published in 1971), and if you grew up on a farm where your grandfather pointed out at every meal that all that you were eating had been grown right there–and more recently, if you read Eric Schlosser’s Fast Food Nation and Michael Pollan’s The Omnivore’s Dilemma–well, you’ve seen Food, Inc. Because the director relies heavily on Schlosser and Pollan’s expertise, large chunks of the film felt like a rehash of these books. We went over the corn thing again (cheap corn makes it cheaper to feed livestock grain instead of grass, leading to factory farms, leading to the need to pump animals full of antibiotics, leading to antibiotic-resistant microbes in the food supply) we spent lots and lots of time with the vocal owner of Polyface Farms, a sustainable operation in Virginia (whom Pollan also interviewed); and we learned, again, that meat packers work in terrible conditions and that chicken farms are dreadful.

It would be wonderful if this film reached a wide audience and brought about more widespread change. For those who haven’t read these materials, the movie will no doubt be eye-opening. And the movie makes specific calls to action in the final sequence that might help us take some practical steps toward making a difference (eat local, reduce meat consumption, and of course, “visit our Web site!”).

They film is optimistic about the future, noting that the actions of consumers can change the market and pointing out that if food conglomerate seem invincible, remember that Big Tobacco, once thought invincible, had been brought down. (Or bought by Nabisco.)

But I was haunted by the thought of Lappe’s book. Her goal was to get Americans to eat in a way that would lead to reduced hunger world wide–largely by drastically reducing meat consumption. Her argument, back in 1971, was based on the idea that our meat production system was terribly inefficient, requiring 21.4 pounds of grain to cattle for every pound of beef we produced. We were misusing agricultural land by deploying it to feed animals rather than people; we should restrict livestock raising to land that couldn’t be used for other agricultural purposes and feed cattle grass instead of grain; and our use of chemical pesticides to produce food in vast quantities was getting into our meat in uncertain and potentially dangerous amounts.

We could change everything, Lappe argued, by eating differently: “The act of putting into your mouth what the earth has grown is perhaps your most direct interaction with the earth . . . . What I will be suggesting in this book is a guideline for eating from the earth that both maximizes the earth’s potential to meet man’s nutritional needs and, at the same time, minimizes the disruption of the earth necessary to sustain him. It’s that simple.”

If only it were.